Set up Cisco AnyConnect on Mac
The below steps show the process of downloading and setting up the Cisco AnyConnect application on macOS 10.14 Mojave, 10.15 Catalina, and 11.0 Big Sur.
Note: If you've already downloaded and installed the application, skip to step 7 for use instructions.
Note: If you've already downloaded and installed the application, skip to step 7 for use instructions.
- Download and install Cisco AnyConnect for Mac
Note: If you have upgraded to macOS 11.0 Big Sur, be sure to upgrade to the most recent version of Cisco AnyConnect to avoid compatibility issues. - If you are currently using AnyConnect for another VPN, you do not need to reinstall the application. You only need to add the new profile, as shown in the remaining steps.
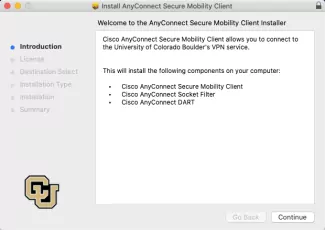
- Open the installer download. The products that will be installed from the package will be listed. Click Continue and go through the installation prompts. Click Close when the installer has finished.
- Non-DDS managed computers will receive an error that requires users to allow a new system extension. Click Open Security Preferences.
Note: This screenshot is from a machine running macOS Big Sur. Other macOS versions may look slightly different.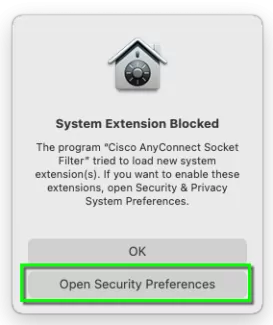
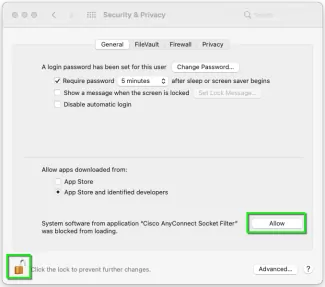
- In System Preferences > Security & Privacy, click Allow to approve the extension. You may need to click the lock in the bottom left corner and enter administrator credentials to change this setting.
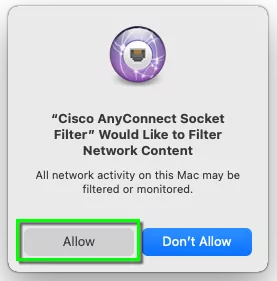
- On computers running Big Sur: Click Allow to confirm the Network Content Filter.
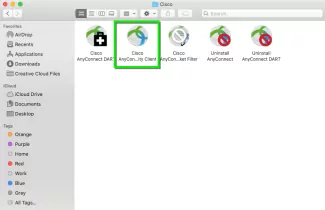
- Search for Cisco AnyConnect Security Mobility Client using the spotlight search in the top toolbar of your mac, or find your applications folder.

- After the initial download, the application is likely in a folder labeled Cisco, located in Applications. Whether you locate it from the Applications folder or using the spotlight search, open the Cisco AnyConnect Security Mobility Client application.
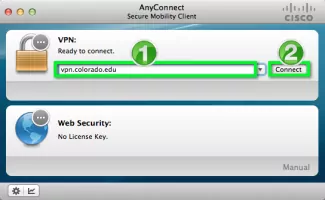
- Type the IP:Port you received via email into the VPN: text field, then click Connect.
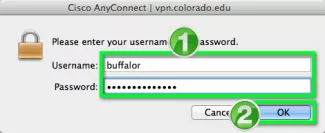
- When prompted to log in, enter your Username and password, then click OK.
- You will now be connected to our VPN service. All your internet activity will be routed securely through the VPN.
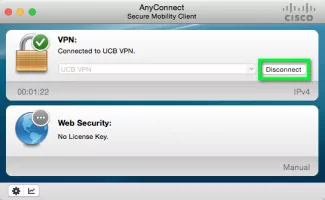
Note: For future connections, the VPN connection can now be selected from the drop-down menu in step 9. - Click the Disconnect button to end your session.